GPU Rendering vs CPU Rendering: A Practical Guide for Cloud Render Farm Users
Overview
What Is GPU Rendering?
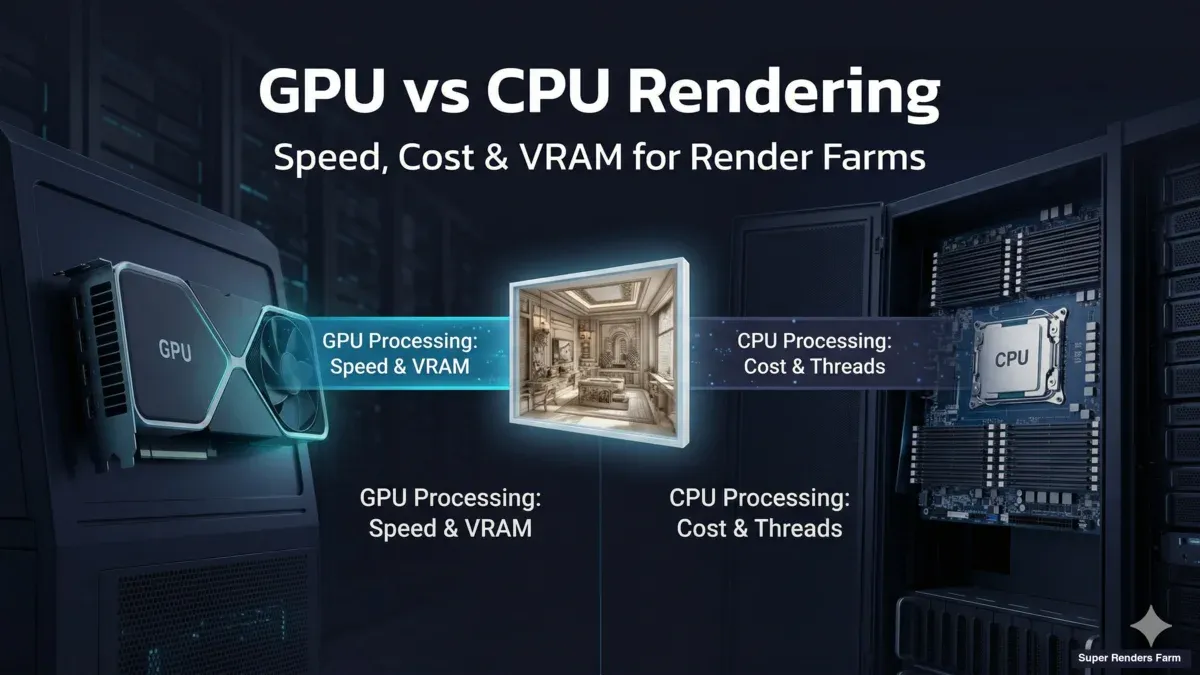
GPU rendering is the process of using a graphics card's parallel processing cores -- rather than a computer's central processor -- to calculate a 3D scene's pixels, so a graphics-heavy render finishes in a fraction of the time a CPU-only pass would take. A modern GPU packs thousands of smaller cores designed to run the same calculation across many pixels or samples simultaneously, which is exactly the kind of workload ray tracing and path tracing produce. That architecture is why GPU rendering became the default choice for artists who need fast iteration -- lookdev previews, motion graphics, and any workflow where seeing the result quickly matters as much as the final frame's quality.
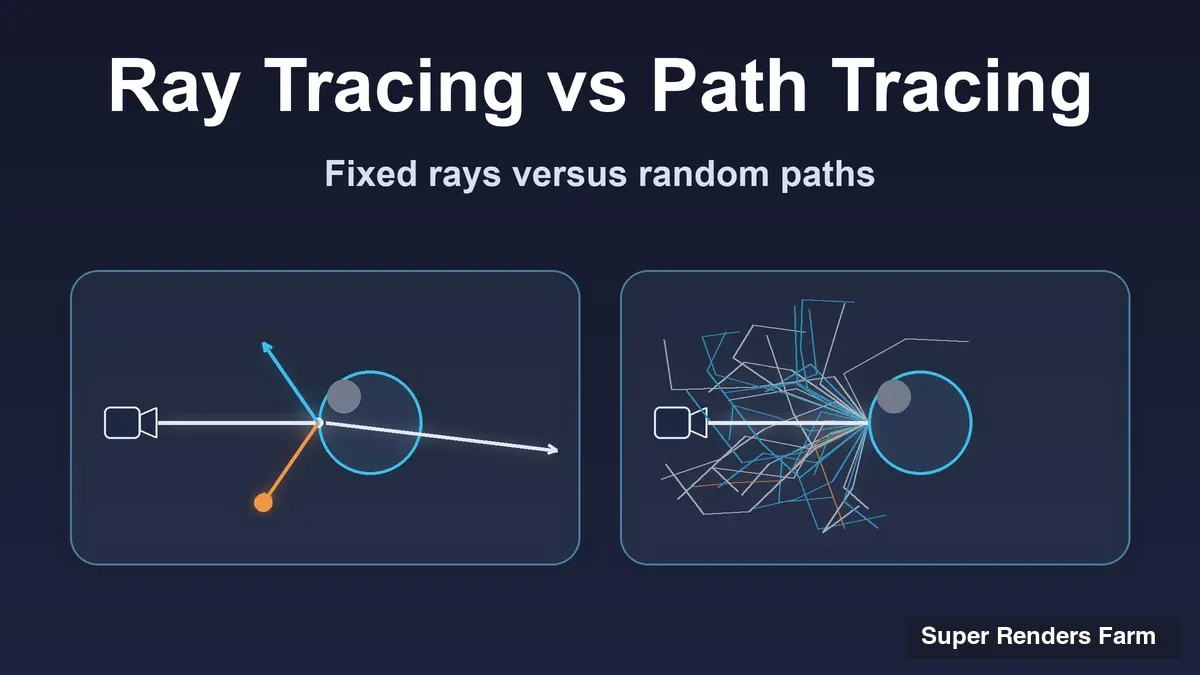
Ray tracing and path tracing are related but distinct techniques, and our guide to ray tracing vs path tracing explains how they differ.
The rest of this guide compares GPU rendering against CPU rendering in practical terms: speed, cost, memory limits, and which render engines run on which hardware. If you are deciding between the two for a cloud render farm job, the sections below walk through the trade-offs with real numbers from our own farm. If you specifically want to understand how a GPU render farm is structured -- hardware, pricing, and workflow -- our dedicated GPU render farm guide covers that in depth.
GPU Rendering, GPU-Accelerated Rendering, GPU Render: Same Thing, Different Names
You will see this concept written several ways across vendor documentation, forums, and render engine manuals: "GPU rendering," "GPU-accelerated rendering," and "GPU render" (as a noun, e.g. "run a GPU render") all refer to the same underlying technique -- offloading render calculations to the graphics card instead of, or in addition to, the CPU. "GPU-accelerated" shows up most often in official engine documentation (Chaos and Maxon both use the phrase to describe hybrid CPU+GPU modes), while "GPU rendering" is the more common search and conversational term. There is no technical distinction between them -- if you searched any of these phrases, this article covers what you are looking for.
Which Render Engines Are GPU-Only, CPU-Only, or Both
Picking the right render engine matters as much as picking GPU vs. CPU in the abstract, because the six engines most common on cloud render farms split three different ways -- some run on GPU only, one runs on CPU only, and the rest give you a genuine choice.
| Render Engine | Hardware Support | Notes |
|---|---|---|
| Redshift | GPU-only | No CPU rendering path. Widely used with Cinema 4D and Maya for motion design and lookdev. |
| Octane | GPU-only | No CPU rendering path. Known for speed on scenes that fit in VRAM. |
| V-Ray | CPU and GPU (separate engines) | V-Ray CPU and V-Ray GPU are distinct rendering modes within the same product -- you choose per job, not a hybrid single mode. |
| Arnold | CPU and GPU | Supports both CPU (the historical default for VFX) and GPU rendering modes. |
| Cycles (Blender) | CPU and GPU | Blender's built-in engine renders on CPU, GPU, or both simultaneously, depending on your device settings. |
| Corona | CPU-only | No GPU rendering path -- Corona remains a CPU-only engine, popular for archviz. |
The practical implication: if your pipeline is built around Redshift or Octane, you do not have a "should I use CPU or GPU" decision to make for that engine -- it is GPU or nothing. If you are on Corona, the inverse is true. V-Ray, Arnold, and Cycles are the three engines where the CPU-vs-GPU choice is a real per-project decision, and the guidance in this article applies most directly to those.
GPU Rendering vs. CPU Rendering: Speed, Cost, and Memory
The core trade-off between GPU and CPU rendering comes down to three factors: how fast each finishes a given scene, what it costs per frame, and how much scene data each can hold in memory before it runs out of room.
We detail how we measure and compare these factors across hardware types in our render farm benchmark methodology.
Speed. GPU rendering is typically faster per dollar on scenes that fit comfortably inside the GPU's VRAM, because a modern card devotes thousands of cores to running the same ray-tracing calculation across many samples at once. On our farm, an RTX 5090 (32 GB VRAM) running Redshift often completes a motion-design frame in 1-4 minutes -- see Example 2 below for a full project comparison, and our RTX 5090 cloud rendering performance breakdown for benchmark detail on that specific card. CPU rendering scales differently: it is linear with core count (a dual Xeon node with 44 cores gives you 44 cores working in parallel, not thousands), which makes it slower per frame on GPU-friendly scenes but far more predictable on scenes GPU hardware struggles with.
Cost. On a per-unit basis, GPU rendering on our farm is billed at $0.003 per OctaneBench-hour (OBh) versus $0.004 per GHz-hour for CPU, with render-engine licensing included in both rates. Those are not directly comparable units -- OBh measures GPU compute in Octane-benchmark terms while GHz-hour measures CPU clock-cycles -- so the real cost comparison has to run per project, not per abstract unit. Example 2 below shows how that plays out on an actual job.
Memory (VRAM vs. RAM). This is where the comparison stops being simply "which is faster" and becomes "which can even finish the job." GPU rendering is bound by the card's VRAM -- our GPU nodes carry 32 GB per card. If a scene's textures, geometry, and cache data exceed that ceiling, GPU rendering either falls back to slower out-of-core rendering (if the engine supports it) or fails outright. CPU rendering draws on system RAM instead, and our CPU nodes run 96-256 GB per machine -- an order of magnitude more headroom. This is the single biggest reason heavy VFX work (dense geometry, large volumetrics, complex hair and fur) still leans CPU: the scene simply does not fit on a GPU.
| Factor | GPU Rendering | CPU Rendering |
|---|---|---|
| Speed on VRAM-fitting scenes | Faster, often significantly | Slower, scales linearly with cores |
| Cost basis (our farm) | $0.003/OBh | $0.004/GHz-hour |
| Memory ceiling | VRAM-bound (32 GB per card on our farm) | RAM-bound (96-256 GB per node on our farm) |
| Best for | Motion design, lookdev, scenes that fit in VRAM | Archviz, VFX, heavy geometry/volumetrics, large scenes |
| Engine examples | Redshift, Octane, V-Ray GPU | Corona, V-Ray CPU, Arnold CPU |
The honest answer to "is GPU rendering faster than CPU rendering": it depends on whether your scene fits in VRAM. When it does, GPU rendering usually wins on speed and often on cost per frame. When it does not, CPU rendering is not just an alternative -- it is the only option that finishes the job at all. Neither is a universal replacement for the other, which is why most production render farms, including ours, run both. If your scenes routinely use more than one GPU per job, our multi-GPU scaling benchmark covers how far 2-GPU-per-node scaling actually gets you before diminishing returns set in.
What Is a Cloud Render Farm, and How Do You Choose One?
A cloud render farm is a cluster of remote computers that processes your 3D scenes in parallel over the internet. Instead of rendering one frame at a time on your local machine, you upload your project to Super Renders Farm, which distributes frames across dozens or hundreds of machines simultaneously, and you download the finished output. What would take your workstation days finishes in hours or less.
If you are new to render farms in general -- what they are, how they work, the different types -- our complete guide to render farms covers the fundamentals in depth. This article focuses specifically on cloud render farms: the practical differences between providers, pricing models, when a cloud farm makes financial sense versus local rendering, and how to prepare your first cloud render job.
For a broader look at cloud rendering beyond render farms -- including the three main service models and cost structures -- see our guide to cloud rendering.
If you want a grounding in what rendering is and how it works before diving into cloud services, our complete guide covers the fundamentals from 3D geometry to final output.
The concept has been around since the early days of CGI -- major studios like Pixar and Weta have operated internal render farms for decades. What changed is accessibility. You no longer need to build a server room or hire a render wrangler. Cloud render farms let individual freelancers and small studios access the same kind of distributed rendering infrastructure that was once exclusive to studios with seven-figure IT budgets.
Here is a short video that walks through the basics:
How Cloud Rendering Works (Quick Pointer)
For the full technical flow of how cloud rendering distributes work across remote machines — scene upload, environment matching, distributed rendering, and result delivery — see our cloud rendering explained guide. This article focuses on the practical side of choosing a cloud render farm: provider comparison, pricing models, real cost examples, and migrating from local rendering.
Types of Cloud Render Farms: Managed vs. IaaS
Not all cloud render farms work the same way. The two main models are fundamentally different in how much they ask from you, and choosing the wrong model is one of the more expensive mistakes studios make when switching to cloud rendering.
Fully Managed Render Farms
A fully managed farm handles everything beyond your scene file: software installation, render engine licensing, plugin management, job scheduling, and troubleshooting. You interact through a desktop app or web interface. You never remote-desktop into a machine or install anything on the farm yourself.
This model works well for studios that want to render without IT overhead. You submit your scene, the farm figures out what software and plugins are needed, renders the job, and delivers frames. If something goes wrong -- a missing texture, a plugin conflict -- the farm's support team helps diagnose and fix it.
We have been running this model at Super Renders Farm since 2010. The workflow is: install our desktop app once, open your project in 3ds Max or Maya, click "Re-Validate" to check for issues, then "Submit to SuperRenders" to send the job -- and download frames when they are ready. The plugin handles texture collection, path remapping, and upload automatically. For software that does not have a plugin yet (Cinema 4D, Blender, Houdini, etc.), you upload to our cloud storage and submit through the web dashboard instead. For a step-by-step walkthrough, see our getting started guide.
When managed is the right choice: Studios without dedicated render operations staff, freelancers who need to focus on creative work rather than infrastructure, projects that use standard DCC + render engine combinations.
IaaS (Infrastructure-as-a-Service) Render Services
IaaS providers give you a remote machine -- typically accessed via RDP (Remote Desktop Protocol) or SSH -- with raw CPU or GPU hardware. You install your own 3D software, configure your own render engine, manage your own licenses, and run renders manually.
This model gives you complete control. You can install any software version, any plugin, any custom pipeline tool. The trade-off is that you are responsible for everything: software licensing, configuration, troubleshooting, and render management. If V-Ray crashes mid-render at 2 AM, you are the one debugging it.
When IaaS is the right choice: Studios with dedicated render operations staff who need specific configurations that managed farms do not support, highly customized pipelines with proprietary tools, GPU-heavy workflows where artists want direct control over the GPU environment.
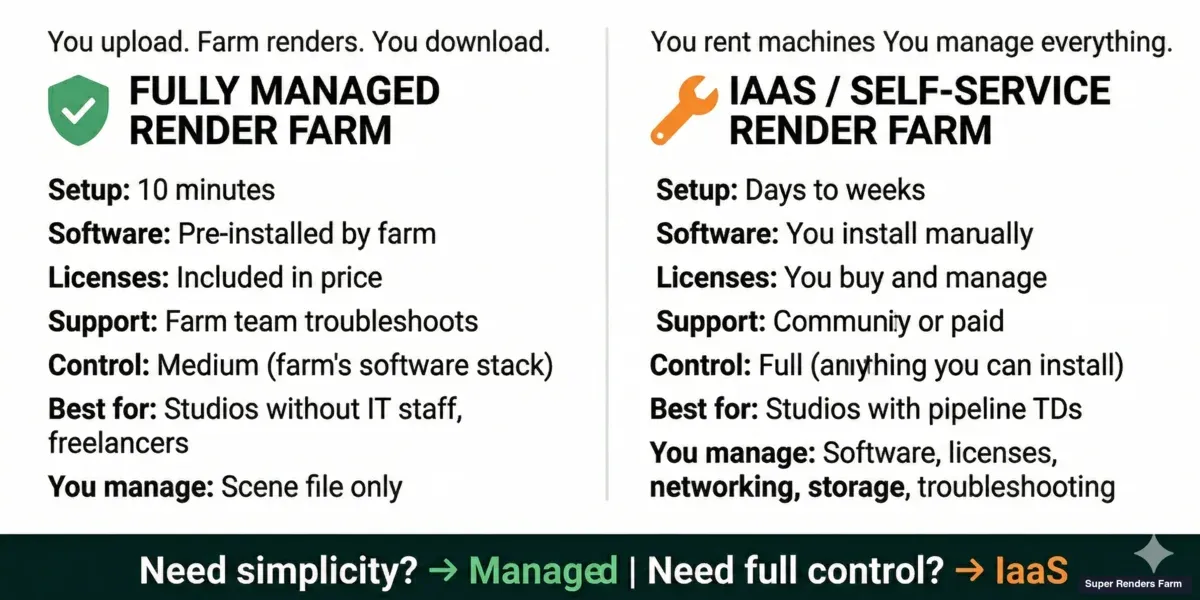 Fully managed render farm vs IaaS render services — setup, control, and cost comparison
Detailed Comparison: Managed vs. IaaS
| Factor | Fully Managed Farm | IaaS (Remote Desktop) |
|---|---|---|
| Software installation | Handled by the farm | You install everything |
| Render engine licensing | Included in render cost | You bring your own licenses |
| Plugin management | Farm maintains common plugins | You install and update |
| Job scheduling | Automatic via farm's render manager | You manage manually or set up your own |
| Troubleshooting support | Farm's team helps diagnose issues | You troubleshoot independently |
| Hardware control | You choose CPU/GPU priority tier | You select specific machine specs |
| Custom pipeline tools | Limited to what the farm supports | Full control, install anything |
| Pricing model | Per GHz-hour or per OBh | Per hour of machine rental |
| Scaling | Automatic -- farm assigns more nodes as needed | Manual -- you spin up/down machines |
| Best for | Creative teams, freelancers, deadline-driven work | Pipeline TDs, custom workflows, R&D |
For a deeper analysis of these two models, see our managed vs. DIY comparison guide.
When Does a Cloud Render Farm Make Sense?
A cloud render farm is not always the right answer. The decision depends on your project scale, rendering frequency, and local hardware capabilities. Here is a practical framework broken down by studio type:
Freelancers and Solo Artists
You likely have one workstation. A cloud render farm makes sense when a single frame takes more than 5-10 minutes locally and you have hundreds or thousands of frames to deliver. The math is straightforward: 1,000 frames at 10 minutes each equals roughly 7 days of continuous rendering on your workstation. A cloud farm with 50 nodes finishes the same job in a few hours.
The break-even point for most freelancers is around $50-$150 per project in cloud costs versus the value of getting your workstation back for a week. If you bill $40-$80 per hour, a week of idle workstation time costs far more than the cloud render.
For freelancers whose primary tool is After Effects, the move to a cloud farm hinges on a small set of AE-specific concerns — plugin parity on the farm node, project file collection, and aerender output formats. Our After Effects cloud rendering setup guide covers the AE-side pre-flight checks for solo artists and small motion-design teams.
Small Studios (2-10 Artists)
Small studios often hit the cloud render farm tipping point when two or more artists need to render simultaneously. A single shared workstation becomes a bottleneck. Building a local render farm requires $15,000-$50,000+ in hardware, plus ongoing electricity, cooling, and maintenance. A cloud farm eliminates that capital expenditure entirely.
The typical pattern we see: studios start with a cloud farm for deadline crunches, then gradually shift to using it for all final renders while keeping local machines for lookdev and test rendering.
Mid-Size Studios (10-50 Artists)
At this scale, the decision becomes more nuanced. Studios with predictable daily render volumes may justify a small local farm (5-10 nodes) for baseline work, supplemented by a cloud farm for burst capacity during crunch periods. This hybrid approach gives you low per-frame cost on routine work and elastic scaling when deadlines compress.
The Break-Even Calculation
The key financial question is not "which is cheapest per frame" but "which model matches your rendering pattern":
| Rendering Pattern | Recommended Approach |
|---|---|
| Sporadic, deadline-driven (a few times per month) | Cloud render farm only |
| Regular but moderate (a few hours per day) | Cloud farm with monthly credits/plan |
| Heavy daily rendering (8+ hours per day, every day) | Hybrid: local farm + cloud burst |
| Continuous rendering with sensitive data | On-premises farm |
For the full financial comparison between building your own farm and using cloud rendering, see our build vs. cloud total cost breakdown.
Cloud Render Farm Pricing Models
Understanding how cloud render farms charge is essential for budgeting. Most farms use one of three pricing structures, and the differences directly affect your per-project cost.
For a detailed comparison of all six pricing models — pay-per-GHz-hour, per-frame, subscription, credits, hybrid, and IaaS rental — including how to calculate effective cost, see our render farm pricing models comparison.
Per-Unit Pricing (Pay-As-You-Go)
You pay for the compute time you actually use, measured in units like GHz-hour (CPU) or OctaneBench-hour (GPU). This is the most transparent model -- you see exactly what compute resources your job consumed.
We charge $0.004/GHz-hour for CPU and $0.003/OBh for GPU, with no subscription or contracts. You buy credits, use them when you have a job, and they never expire. The advantage is zero waste: you pay only for what you use. The disadvantage is that costs can be harder to predict for complex projects until you have run a few test renders.
Subscription Plans
Some farms offer monthly plans with a set number of render credits or hours included. These can be economical for studios with steady, predictable render volumes -- the per-unit rate is typically 20-40% lower than pay-as-you-go. The trade-off is that unused credits may expire, and exceeding your plan's allowance triggers overage charges at a higher rate.
Per-Frame Pricing
A few farms charge per output frame rather than per compute time. This is simpler to budget for -- you know upfront that 1,000 frames costs $X. However, you lose visibility into the actual compute cost. A simple scene and a complex scene with the same frame count may cost the same, which penalizes simpler jobs and subsidizes complex ones.
What Affects Your Total Cost
Regardless of the pricing model, these factors determine your total bill:
- Scene complexity -- more polygons, higher-resolution textures, complex lighting, and volumetrics all increase render time per frame
- Output resolution -- 4K takes roughly 4 times longer per frame than 1080p
- Frame count -- linear scaling: 2,000 frames costs roughly twice as much as 1,000 frames
- Priority level -- higher priority means more machines working simultaneously, which finishes faster but costs more per frame (you are paying for parallel compute, not faster individual machines)
- Render engine settings -- higher sample counts, GI bounces, or denoiser quality increase per-frame time
For a comprehensive breakdown, see our render farm pricing guide.
Real Cost Examples
These estimates are based on typical projects rendered on our farm. Actual costs vary by scene complexity, render settings, and priority level. All prices reflect our rates as of 2026 and should be treated as approximate ranges.
Example 1: Archviz Animation (V-Ray CPU)
- Project: 1,000-frame architectural walkthrough at 2K resolution
- Engine: V-Ray CPU (Corona would be similar)
- Average frame time on farm: 3-8 minutes per frame on a dual Xeon node (44 cores, 3.6 GHz)
- Estimated cost range: $15-$45
- Comparison: The same job on a single 16-core workstation at 15-30 minutes per frame would take 10-20 days of continuous rendering
Example 2: Motion Design (Redshift GPU)
- Project: 500-frame broadcast commercial at 1080p
- Engine: Redshift (GPU)
- Average frame time on farm: 1-4 minutes per frame on an RTX 5090 (32 GB VRAM)
- Estimated cost range: $8-$25
- Comparison: On a local RTX 4080 workstation, the same job might take 6-15 hours depending on scene complexity
Example 3: VFX Shot (Arnold CPU)
- Project: 250-frame feature-film VFX shot at 4K, heavy volumetrics and subsurface scattering
- Engine: Arnold CPU
- Average frame time on farm: 15-45 minutes per frame on a dual Xeon node
- Estimated cost range: $35-$100
- Comparison: On a single workstation, this could take 3-8 days of continuous rendering
These numbers illustrate a consistent pattern: cloud rendering costs a fraction of the value of the time it saves. For per-frame pricing breakdowns across different engines and project types, see our cost-per-frame guide.
Cloud Render Farm Comparison (2026)
Choosing between cloud render farms requires comparing concrete specifications, not marketing claims. The table below covers five established providers. Where data was not publicly available, we note "Check provider" rather than speculate.
| Feature | Super Renders Farm | GarageFarm | RebusFarm | SheepIt | Ranch Computing |
|---|---|---|---|---|---|
| Service model | Fully managed | Fully managed | Fully managed | Community (free) | Fully managed |
| CPU specs | Dual Xeon E5-2699 V4, 96-256 GB RAM | Dual Xeon, 64-256 GB RAM | Check provider | Volunteer hardware (varies) | Check provider |
| GPU specs | NVIDIA RTX 5090, 32 GB VRAM | NVIDIA RTX 4090, 24 GB VRAM | Check provider | Volunteer GPUs (varies) | Check provider |
| CPU pricing model | Per GHz-hour ($0.004/GHz-hr) | Per GHz-hour | Per GHz-hour + priority multiplier | Free (community-powered) | Per GHz-hour |
| GPU pricing model | Per OBh ($0.003/OBh) | Per OBh | Check provider | Free (community-powered) | Check provider |
| Minimum deposit | $5 (free trial available) | $25 | Check provider | Free | Check provider |
| Free trial | Yes | Yes (trial credits) | Yes (trial credits) | N/A (free service) | Yes (trial credits) |
| 3ds Max | Yes (plugin) | Yes (plugin) | Yes (plugin) | No | Yes |
| Maya | Yes (plugin) | Yes (plugin) | Yes | No | Yes |
| Cinema 4D | Yes (web upload) | Yes (plugin) | Yes (plugin) | No | Yes |
| Blender | Yes (web upload) | Yes (plugin) | Yes (plugin) | Yes (Cycles/EEVEE) | Yes |
| Houdini | Yes (web upload) | Yes | Yes | No | Yes |
| V-Ray | Yes (CPU + GPU) | Yes (CPU + GPU) | Yes | No | Yes |
| Corona | Yes | Yes | Yes | No | Yes |
| Redshift | Yes | Yes | Yes | No | Yes |
| Arnold | Yes | Yes | Yes | No | Yes |
| Support hours | 24/7 live chat | 24/7 live chat | Business hours (EU) | Community forum | Business hours (EU) |
Important notes on this comparison:
- Pricing and specs are based on publicly available information as of early 2026. Providers update their offerings regularly -- always verify directly.
- SheepIt is a free, community-powered render farm for Blender only. Render times depend on volunteer availability and cannot be guaranteed, which makes it unsuitable for deadline-driven work.
- "Check provider" means the information was not clearly published on the provider's website at the time of writing. We chose not to guess.
- This table presents facts for your own evaluation. Every provider has different strengths, and the right choice depends on your specific software stack, budget, and workflow requirements.
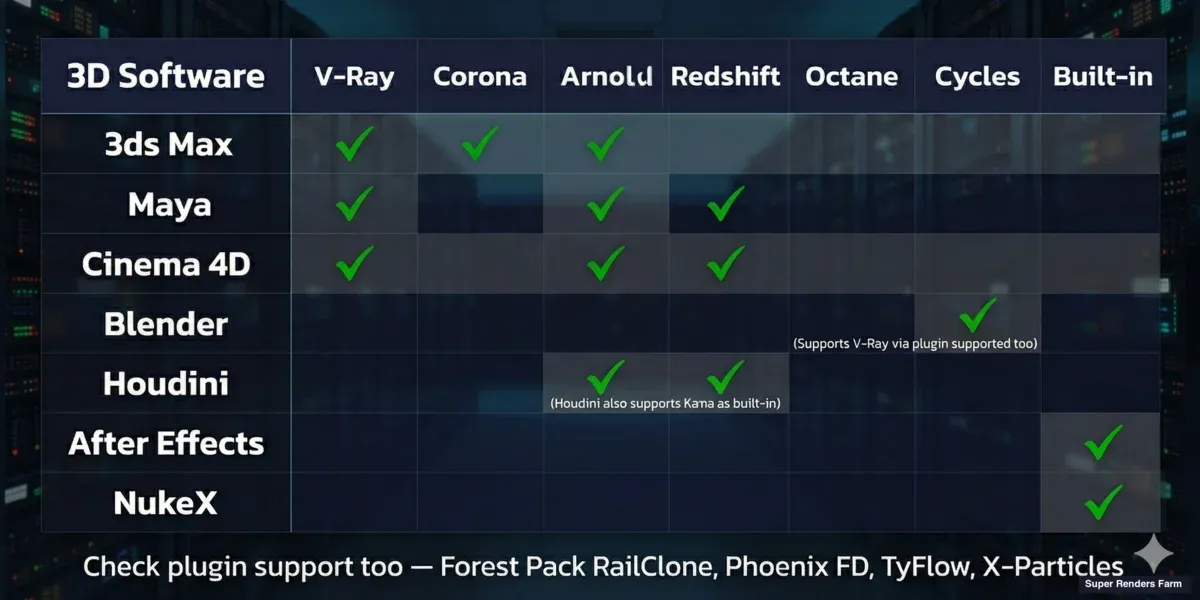 Cloud render farm software support matrix — 3ds Max, Maya, Cinema 4D, Blender, Houdini with supported render engines
Migrating from Local Rendering to a Cloud Render Farm
If you have been rendering locally and are considering a cloud render farm for the first time, the transition is straightforward -- but a few preparation steps prevent common frustrations.
File Preparation
Consolidate all assets into a single project folder. Cloud render farms need every file your scene references: textures, HDRIs, proxy objects, cache files, IES light profiles, and any other external assets. If your textures live in five different folders across two drives, the farm will not find them.
- 3ds Max: Use "Archive" or the Asset Tracking dialog to gather all external files
- Cinema 4D: Use "Save Project with Assets" to bundle everything
- Maya: Use the File Path Editor to verify all references resolve, then collect the project
- Blender: Use "File > External Data > Pack Resources into .blend" for single-file delivery, or "Save As" into a clean project directory. For Blender-specific cloud rendering guidance, see our Blender render farm guide
- Houdini: Use the Package Scene function to collect all dependencies
Texture Paths
Use relative paths, not absolute paths. If your textures reference D:\Projects\Client_ABC\Textures\brick_diffuse.png, the farm's machines will not find that path. Convert all texture references to paths relative to the project folder. Most 3D applications can strip or remap paths during export.
This is the single most common cause of failed first renders on any cloud farm. Missing textures typically render as black or magenta, and you may not notice until you have burned through credits on an entire sequence.
Test Before Committing a Full Job
Always run a test render first. Upload a representative frame -- not your simplest scene, but one that reflects your actual production complexity. Check:
- All textures render correctly (no black or magenta surfaces)
- Plugins load properly (Forest Pack scattering appears, RailClone arrays populate)
- Render settings produce the expected quality level
- Output format and naming convention match your post-production pipeline
Most managed farms offer free trial credits specifically for this test phase. Use them -- discovering a path issue on frame 1 of 10 costs nothing beyond a few minutes. Discovering it on frame 500 of 1,000 costs real money.
Upload Strategy for Large Projects
For projects with large texture sets (5 GB+), upload speed becomes a practical concern. Most managed farms offer dedicated upload tools optimized for large transfers. Some offer cloud storage where you can pre-upload asset libraries once and reference them across multiple jobs, avoiding repeated uploads of the same HDRIs and texture packs.
If your internet upload speed is limited, consider rendering a portion of your sequence as a test batch (frames 1, 250, 500, 750, 1000) to verify correctness before committing the full upload. This catches scene-wide issues without uploading your full frame range twice.
How to Get Started with Cloud Rendering (Step-by-Step)
If you have never used a cloud render farm before, the setup process is simpler than most beginners expect. The steps below apply to any fully managed render farm -- the specifics vary by provider, but the sequence is the same.
Step 1 -- Create an account and run a test render. Most farms offer a free trial with enough credits for a handful of test frames. Use this to verify that your software version, render engine, and plugins are supported before committing to a paid job. Upload a representative frame -- not your simplest scene, but one that reflects your actual production complexity.
Step 2 -- Prepare your scene file. Consolidate all external assets (textures, HDRIs, proxy files, cache files) into a single project folder. In 3ds Max, use "Archive"; in Cinema 4D, "Save Project with Assets"; in Maya, use the File Path Editor to verify all references resolve. Missing textures are the single most common cause of failed first renders on any farm.
Step 3 -- Upload and configure. Most managed farms provide a desktop application or web uploader. Select your scene file, choose the frame range, output format, and resolution. The farm's system reads your scene settings automatically -- but double-check the render engine selection, especially if your scene includes overrides.
Step 4 -- Monitor and download. Frames render in parallel across multiple machines. A 500-frame sequence that takes 40 hours locally might complete in under two hours on 50 nodes. As frames finish, preview them for correctness -- catching a missing texture at frame 10 is cheaper than discovering it at frame 500. Download completed frames in batch or stream them to cloud storage.
Step 5 -- Iterate. Your first cloud render rarely goes perfectly. Expect one or two minor issues (a texture path, a plugin version mismatch, an output format setting) and budget an extra test render to resolve them. By the second or third job, the workflow becomes routine.
For a detailed walkthrough specific to our farm -- including account setup, the Render Dashboard, and cost estimation -- see our getting started guide.
Choosing a Cloud Render Farm: What Actually Matters
If you have decided a cloud render farm makes sense, here is what to evaluate beyond the comparison table above:
Software and plugin support -- does the farm run your exact software version, render engine, and plugins? A farm that supports "3ds Max" generically may not support your specific V-Ray build or your Forest Pack version. Ask specifically.
Hardware transparency -- does the farm tell you what hardware your job runs on? Knowing the CPU model, core count, or GPU model (e.g., RTX 5090 vs. RTX 4090) directly affects your cost estimate and render time.
Pricing model -- per-unit, subscription, or per-frame? How does priority pricing work? Is there a free trial to test before committing?
Support quality -- when your job fails at midnight before a deadline, can you reach a human? On our farm, we run 24/7 live chat support because rendering deadlines do not respect business hours. Check whether the farm you are evaluating offers live chat, email-only, or ticketed support -- and test it before you have an emergency.
Reliability -- price per core-hour looks good in spreadsheets, but failed renders, re-uploads, and queue delays eat time and money. A slightly higher rate at a farm that delivers clean results on the first try is often cheaper in practice.
Data security -- if you work under NDA (common in film, advertising, and product design), verify the farm's data handling: encryption in transit and at rest, data retention policies, and whether they offer NDA agreements. On our farm, project files and render output are used only for your job, stay available for you to download with no fixed automatic deletion period, and are deleted on request. For studios with strict confidentiality requirements, see our NDA policy.
FAQ
Q: Do I need to install software on the cloud render farm myself? A: At Super Renders Farm, on a fully managed cloud render farm, no. The farm already has your 3D software, render engines, and common plugins installed and licensed. You submit your scene and download results. On IaaS (remote desktop) services, yes -- you install and configure everything yourself, similar to setting up a new workstation.
Q: What is the difference between a managed cloud render farm and IaaS? A: A managed farm handles everything: software, licensing, job scheduling, and troubleshooting. You submit scenes and download results. IaaS gives you a remote machine with raw hardware -- you install software, manage licenses, and run renders yourself via remote desktop. Managed is simpler and requires no IT expertise; IaaS gives more control but requires technical knowledge. See our full comparison guide for details.
Q: What happens if a render fails on a cloud render farm? A: On a managed farm, the support team investigates the failure. Common causes include missing textures, plugin version mismatches, or scenes that exceed available memory. Most managed farms help diagnose and fix the issue at no extra charge for the failed frames. On IaaS, troubleshooting is your responsibility.
Q: How do I set up a cloud render farm for the first time? A: Start by creating a free trial account on a managed render farm. Upload a test scene with all textures consolidated into one project folder, select your frame range and render settings, and submit. Most beginners complete their first successful cloud render within an hour of signing up. The key is to test with a representative scene before committing a full production job.
Q: How fast can I upload large project files to a cloud render farm? A: Upload speed depends on your internet connection and the farm's upload infrastructure. Most managed farms provide optimized upload tools that handle large files (10 GB+) more reliably than browser uploads. On a 100 Mbps connection, a 5 GB project uploads in roughly 7 minutes. Some farms also offer persistent cloud storage where you can pre-upload asset libraries and reference them across multiple jobs, avoiding repeated uploads.
Q: What is the minimum deposit or cost to try a cloud render farm? A: Most cloud render farms offer free trial credits ranging from $5 to $25, enough to render a handful of test frames. On our farm, the minimum deposit is $5 with free trial credits included. This is enough to test your scene, verify plugin compatibility, and evaluate render quality before committing to a paid production job.
Q: Can I use a cloud render farm for a single still image, or only animations? A: Cloud render farms handle both stills and animations. For single still images, the farm can split the image into tiles (regions) and render each tile on a separate machine in parallel. This means a high-resolution still that takes 2 hours locally might finish in 10-15 minutes on a farm. However, the overhead of uploading and distributing the job means very quick local renders (under 5-10 minutes) may not benefit from a cloud farm.
Q: How do priority queues work on cloud render farms? A: Priority determines how many machines are assigned to your job and how quickly it starts rendering. Higher priority means more machines working simultaneously, which finishes the job faster but costs more because you are paying for parallel compute time. Lower priority uses fewer machines, takes longer, but costs less per frame. Most farms offer 3-5 priority tiers. Choose based on your deadline: tight deadline warrants higher priority; flexible timeline saves money at lower priority.
Q: What is the difference between a cloud render farm and using AWS or Azure for rendering? A: AWS, Azure, and Google Cloud provide raw virtual machines that you configure yourself -- this is essentially the IaaS model. You install your own 3D software, manage licenses, set up render management software, and handle troubleshooting. A dedicated cloud render farm (like a managed service) handles all of that for you. The cloud providers offer more flexibility and potentially lower per-hour rates at scale, but the setup complexity and licensing management make them impractical for most studios without dedicated DevOps staff.
Q: What is a rendering farm? A: A rendering farm is a network of high-performance computers that process 3D scenes in parallel. When the farm runs on remote servers accessed over the internet, it is called a cloud render farm. Artists upload project files, the farm distributes frames across multiple machines, and finished renders are returned for download — often completing in hours what would take days on a single workstation.
Q: How much does a cloud render farm cost per frame? A: The cost per frame on a cloud render farm depends on scene complexity, resolution, render engine, and the priority level you select. Simple frames may cost a few cents each, while heavy simulations or high-resolution architectural renders can reach several dollars per frame. Most cloud render farms, including Super Renders Farm, offer a cost calculator so you can estimate expenses before committing.
Q: What is GPU rendering? A: GPU rendering is using a graphics card's parallel processing cores to calculate a 3D scene's pixels instead of relying on the computer's central processor. Because a GPU runs thousands of smaller cores in parallel, it is well suited to ray tracing and path tracing workloads, which is why render engines like Redshift and Octane are built GPU-only and why V-Ray, Arnold, and Cycles all offer a GPU mode alongside their CPU mode.
Q: Is GPU rendering faster than CPU rendering? A: GPU rendering is usually faster on scenes that fit within the GPU's VRAM, because the graphics card can process far more parallel calculations than a CPU's core count allows. But GPU rendering is bound by VRAM (32 GB per card on our farm), while CPU rendering draws on system RAM (96-256 GB per node on our farm) -- so on scenes with heavy geometry, large textures, or complex volumetrics that exceed VRAM, CPU rendering finishes the job while GPU rendering may fail or fall back to slower out-of-core modes. Neither is universally faster; it depends on whether the scene fits in GPU memory.
About Alice Harper
Blender and V-Ray specialist. Passionate about optimizing render workflows, sharing tips, and educating the 3D community to achieve photorealistic results faster.