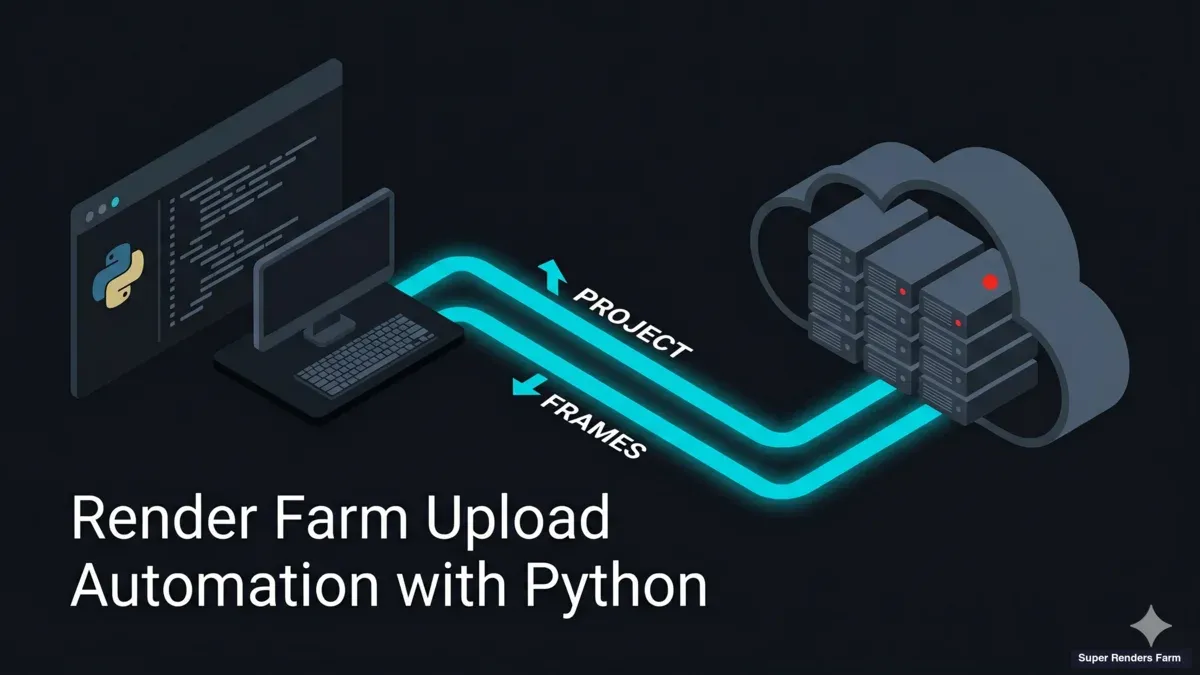
Render Farm Automation with Python: What You Can Script Today
Overview
The slowest part of a cloud render is often everything around the render: the scene that fails because one texture still points at a local drive, the upload that has to be restarted, the frames that came back while nobody checked whether all of them came back. The useful question is where a Python script can actually reach.
We run Super Renders Farm, a fully managed farm, and we want to be exact about that boundary, because automation built on a path that does not exist fails on its first unattended night. So here is the plain version up front. Moving project files to the farm can be scripted: S3 access (Cloud Direct Connect in your account) gives you an access key that the AWS CLI uses to copy files to and from your SRF Space. Job submission cannot: jobs are submitted from the web dashboard, the Client App, or the submission plugin inside 3ds Max, Maya, or Cinema 4D. We do not offer an SFTP or FTP service, a public API or SDK, or a job-submission endpoint you can call from code. A public API for programmatic submission is on our roadmap; it is not available now, and nothing below depends on it.
A note for readers who saw this page before: an earlier version described scripted transfers over SFTP. That path is not offered on our farm; scripted transfers now go through S3 access, covered below.
That still leaves a lot for Python. Everything before the upload, the upload itself, and everything after the frames land on your disk can be scripted. For the conceptual map of headless and unattended rendering, see our headless render farm unattended workflow guide; this one stays at the level of code.
Where the boundary sits on a managed farm
On our farm, the pipeline splits into four stretches.
- Before upload: yours, fully scriptable. Scene validation inside your DCC, path fixes, packaging, pre-flight checks, checksums.
- Upload: scriptable with S3 access, or manual. The AWS CLI copies the project folder to your SRF Space from a script. The manual options are the web upload and the SuperRenders Client App. Web upload has no hard size cap, but it does not resume if the tab closes, so for anything beyond a few gigabytes, or on an unstable connection, use the Client App (resumable, parallel chunks) or S3 access. A single browser upload gets slow above about 2 GB and unreliable above about 5 GB on residential connections.
- Submission: manual. You submit from the web dashboard, the Client App, or the submission plugin, and the farm runs Scene Analysis on the uploaded project before the job is charged.
- After render: yours again. With the Client App's auto-download on, frames stream to a local folder as each one finishes, or a script pulls them over S3. From the moment a frame is on your disk, every check, encode, copy and notification is a local script.
So the realistic shape is automation on both sides of one short manual step, and the scripts below make that step quick and hard to get wrong. Our explainer on what a fully managed render farm is covers what the managed model handles for you.
 Three lanes: scriptable scene checks and S3 upload, manual job submission, then scriptable frame checks and encoding
Automation sits on both sides of one short manual step: validate, pre-flight, manifest and upload on your side, submit by hand, then verify and post-process what comes back.
Three lanes: scriptable scene checks and S3 upload, manual job submission, then scriptable frame checks and encoding
Automation sits on both sides of one short manual step: validate, pre-flight, manifest and upload on your side, submit by hand, then verify and post-process what comes back.
Step 1: Validate the scene inside your DCC
In our experience, most failed render jobs are not renderer bugs. They are packaging gaps: a texture on a drive the farm never sees, a referenced file that was not collected, a cache one folder above the project root. A worker can only open what is inside the uploaded folder, so the first script belongs inside the DCC, where it can read the scene's own dependency list.
Every major DCC exposes this through Python: maya.cmds in Maya, pymxs in 3ds Max, the c4d module in Cinema 4D, hou in Houdini, bpy in Blender. Run the DCC's own collect step first (Resource Collector in 3ds Max, or Archive followed by unpacking the archive it writes; Save Project with Assets in Cinema 4D; in Blender, keep assets under the .blend's folder and run Make Paths Relative). The collect step gathers the files; your script proves the result. The Blender version runs in the Scripting workspace or headless with blender -b scene.blend --python check_paths.py:
# check_paths.py: runs inside Blender, reads the open .blend, touches nothing remote
import os
import sys
import bpy

def inside(path, root):
    try:
        a, b = os.path.normcase(path), os.path.normcase(root)
        return os.path.commonpath([a, b]) == b
    except ValueError:
        return False   # different drive on Windows

def main():
    if not bpy.data.filepath:
        if bpy.app.background:
            sys.exit("save the .blend first")
        print("save the .blend first")
        return

    bpy.ops.file.make_paths_relative()   # rewrite paths under the .blend's folder to // form
    blend_dir = os.path.dirname(bpy.data.filepath)

    refs = [("image", i) for i in bpy.data.images
            if i.source == "FILE" and not i.packed_file]   # skip generated, sequence, UDIM, packed
    refs += [("library", lib) for lib in bpy.data.libraries]
    refs += [("cache", c) for c in bpy.data.cache_files]     # Alembic and USD caches
    refs += [("volume", v) for v in bpy.data.volumes]        # OpenVDB volumes

    issues = []
    for kind, block in refs:
        full = os.path.abspath(bpy.path.abspath(block.filepath))
        if not os.path.exists(full):
            issues.append((f"missing {kind}", block.name, block.filepath))
        elif not inside(full, blend_dir):
            issues.append(("outside project", block.name, block.filepath))

    for kind, name, path in issues:
        print(f"{kind:16} {name:32} {path}")
    if not issues:
        bpy.ops.wm.save_mainfile()        # keep the relative paths only when the scene is clean
    if bpy.app.background:
        sys.exit(1 if issues else 0)

main()
The pattern carries over to every DCC: resolve every file reference, flag anything missing, and flag anything that resolves outside the project root.
Some projects cannot go relative, because scatter libraries, people libraries and certain caches hold absolute paths internally. For those, the Client App's Auto keep local path option preserves the absolute folder structure on upload, and when the farm-side path has to differ from your local one, our Simulate Local Path utility recreates the path the scene expects. Your script then checks "everything under the roots you preserve" instead of "everything under the project root". For 3ds Max, our guide on how to package a 3ds Max file walks through the collect step.
Step 2: Pre-flight check the project folder
The DCC check knows the scene; the folder check knows the upload. It catches problems that live on disk: no scene file, an archive someone dropped in, zero-byte files from an interrupted copy, paths long enough to trip older Windows applications.
The archive check matters more than it looks. The farm does not extract archives (.zip, .rar, .7z, .tar, .tar.gz), so nothing inside an archive gets rendered. Upload your project folder unpacked, with the scene file and every referenced asset in place.
#!/usr/bin/env python3
"""preflight.py: check a project folder before upload. Reads local disk only."""
import json
import sys
from pathlib import Path

SCENE_SUFFIXES = {".max", ".ma", ".mb", ".c4d", ".blend", ".hip", ".hiplc", ".aep"}
ARCHIVE_SUFFIXES = {".zip", ".rar", ".7z", ".tar", ".tgz"}  # the farm does not extract these
SINGLE_BROWSER_UPLOAD_GB = 2     # above this, use the Client App or S3 access instead
LONG_PATH = 240                  # headroom under the classic 260-character Windows limit

def preflight(root: Path) -> dict:
    files = [p for p in root.rglob("*") if p.is_file()]
    scenes = [p for p in files if p.suffix.lower() in SCENE_SUFFIXES]
    total = sum(p.stat().st_size for p in files)
    problems, warnings = [], []

    if not scenes:
        problems.append("no scene file found in the folder")
    for p in files:
        rel = p.relative_to(root)
        if p.suffix.lower() in ARCHIVE_SUFFIXES or p.name.lower().endswith(".tar.gz"):
            problems.append(f"archive will not be unpacked: {rel}")
        if p.stat().st_size == 0:
            warnings.append(f"zero-byte file: {rel}")
        if len(str(p)) > LONG_PATH:
            warnings.append(f"long path ({len(str(p))} chars): {rel}")
    if total > SINGLE_BROWSER_UPLOAD_GB * 1024**3:
        warnings.append("over ~2 GB: use the Client App or S3 access, not one browser upload")

    return {"root": str(root), "files": len(files), "gigabytes": round(total / 1024**3, 2),
            "scenes": [str(p.relative_to(root)) for p in scenes],
            "problems": problems, "warnings": warnings}

if __name__ == "__main__":
    report = preflight(Path(sys.argv[1]).resolve())
    print(json.dumps(report, indent=2))
    sys.exit(1 if report["problems"] else 0)
The non-zero exit code is the point. Wire the script into whatever already runs at the end of an artist's day (a publish tool, a save hook, a "ready for farm" button) so a project with problems never reaches the upload. Warnings print; problems block.
Step 3: Write a manifest so you know exactly what you sent
Once a project passes pre-flight, record it. A manifest lists every file with its size and SHA-256 hash, written next to the project rather than inside it so it never becomes part of the upload. It answers three questions that otherwise cost an afternoon: which version of the scene rendered, what changed since the last submission, and whether the folder on disk still matches what went up.
# manifest.py: hash a project folder and compare two snapshots. Local files only.
import hashlib
import json
import time
from pathlib import Path

def sha256(path: Path, chunk: int = 8 * 1024 * 1024) -> str:
    h = hashlib.sha256()
    with open(path, "rb") as f:
        while block := f.read(chunk):
            h.update(block)
    return h.hexdigest()

def write_manifest(root: Path, out: Path) -> dict:
    files = [{"path": p.relative_to(root).as_posix(), "bytes": p.stat().st_size, "sha256": sha256(p)}
             for p in sorted(root.rglob("*")) if p.is_file()]
    manifest = {"project": root.name, "created": time.strftime("%Y-%m-%dT%H:%M:%S"), "files": files}
    out.write_text(json.dumps(manifest, indent=2))
    return manifest

def diff_manifests(old: dict, new: dict):
    a = {f["path"]: f["sha256"] for f in old["files"]}
    b = {f["path"]: f["sha256"] for f in new["files"]}
    changed = sorted(k for k in a.keys() & b.keys() if a[k] != b[k])
    return sorted(b.keys() - a.keys()), sorted(a.keys() - b.keys()), changed
Store manifests by shot and version (shot010_v003.manifest.json) and the diff becomes a one-line summary: "two textures changed, one cache added, nothing removed".
Scripting transfers with the AWS CLI
S3 access (Cloud Direct Connect in your account) lets you generate an access key, then connect Cyberduck (protocol: Amazon S3) or the AWS CLI to your SRF Space to upload and download files. Cyberduck suits people who want a file browser; the AWS CLI is the one a script can drive. S3 access moves files only: it is not an SFTP or FTP service, and it does not submit jobs.
Setup is once per machine. In your account, open Cloud Direct Connect, generate an access key, and copy the Access Key ID, Secret Access Key and Remote Directory. Then store the key in a named AWS profile:
aws configure --profile srf      # both keys; region ap-southeast-1; output format blank or json
export AWS_PROFILE=srf           # the AWS CLI and boto3 both read this
Upload the project folder unpacked, the same folder that passed pre-flight, into your Remote Directory:
aws s3 cp ./shot010_v003 "s3://<your Remote Directory>/shot010_v003/" --recursive
aws s3 sync takes the same source and target without --recursive and copies only files that are new or changed by size or timestamp, so re-running it after an interrupted transfer skips what already arrived. Large files are split into parallel multipart uploads automatically. Files uploaded this way appear in your SRF Space and can be submitted like any other upload. One caution for pre-flight: when a project syncs to the render nodes, files matching *.ini, *.db, *.tmp, *.temp, *.lnk, *.swap and *.partial, and any rendertemp/ folder, are skipped, so the scene must not depend on them.
The Python side is a thin wrapper: run pre-flight, refuse to upload on a problem, then hand the folder to the AWS CLI.
# upload_project.py: pre-flight, then copy the folder to your SRF Space with the AWS CLI.
import os
import subprocess
import sys
from pathlib import Path

from preflight import preflight   # the Step 2 script

def upload(project: Path, remote_dir: str) -> None:
    report = preflight(project)
    if report["problems"]:
        sys.exit("pre-flight failed: " + "; ".join(report["problems"]))
    target = f"s3://{remote_dir.removeprefix('s3://').strip('/')}/{project.name}/"
    subprocess.run(["aws", "s3", "sync", str(project), target,
                    "--region", "ap-southeast-1"], check=True)

if __name__ == "__main__":
    upload(Path(sys.argv[1]).resolve(), os.environ["SRF_REMOTE_DIR"])
If you would rather stay inside Python, boto3's upload_file does the same job against the bucket and prefix in your Remote Directory, with the same profile and region.
The same key works in the other direction. Rendered output lands in the SuperRendersOutput/<jobId>/ folder of your Space (aws s3 ls "s3://<your Remote Directory>/SuperRendersOutput/" lists the job folders), and one command pulls a job to a local folder:
aws s3 sync "s3://<your Remote Directory>/SuperRendersOutput/<jobId>/" ./renders/shot010_v003/
Treat the key like a password:
- Anyone holding the key can reach your SRF Space. Keep it in an AWS profile or in the
AWS_ACCESS_KEY_IDandAWS_SECRET_ACCESS_KEYenvironment variables on the machine that runs the upload, never in the script itself. - Never commit it to a repository or paste it into a shared pipeline config. Keep the Remote Directory in an environment variable too, as above.
- Each account has one key, and it does not expire. If you think it has leaked, or it needs to change, contact our support team.
What stays manual is submission. After the upload, you still submit the job from the web dashboard, the Client App, or a DCC plugin.
Step 4: Make the submission handoff short and repeatable
Submission is a person clicking through a form, so make the form the easy part. Have the validation step also write a small handoff sheet beside the manifest: scene file, camera, frame range, resolution, output format, render engine, and the local folder where frames should land. The person submitting copies values instead of remembering them, and the watcher in Step 5 reads the same sheet, so the two cannot disagree.
Three conventions make the chain easier to automate:
- One folder per shot and version (
shot010_v003/), scene file at its root. Pre-flight, manifest, upload target and handoff sheet all key off that name. - Padded frame numbers in output names (
shot010.1001.exr). A watcher cannot verify a range it cannot parse. - A predictable download folder per job. The Client App downloads to a default path set in its settings, and you can override the path per job when you submit. Point it at the shot's own render folder.
In 3ds Max, Maya and Cinema 4D, the submission plugin reads the frame range, output path and render settings from the open scene, pre-fills the job form and runs its own asset check. Blender, Houdini and After Effects have no in-DCC plugin, so those jobs go through the Client App or the web dashboard. Either way, Scene Analysis runs before the job is charged; your scripts make that gate stop you less often.
Step 5: Verify the frames that come back
With the Client App running and auto-download on (the default), each frame downloads to your machine as soon as it finishes on the farm; with S3 access, your own aws s3 sync run fills a local folder instead. Either way the question becomes "how do I know all of them arrived intact". A watcher answers that from local files alone: a frame counts as complete only when its size has stopped changing between two polls and its file header is valid.
# watch_frames.py: verify frames arriving in a local folder. Reads local disk only.
import re
import time
from pathlib import Path

MAGIC = {".exr": b"\x76\x2f\x31\x01", ".png": b"\x89PNG\r\n\x1a\n"}

def header_ok(path: Path) -> bool:
    magic = MAGIC.get(path.suffix.lower())
    with open(path, "rb") as f:
        head = f.read(8)
    return head.startswith(magic) if magic else len(head) > 0

def watch(job_dir: Path, first: int, last: int, poll: int = 60, give_up_hours: float = 24,
          name_re: str = r"\.(\d{4,})\.(exr|png)$") -> list:
    # name_re: default matches any frame-numbered file. Anchor it to one pass's file
    # prefix (e.g. r"^shot010_beauty\.(\d{4,})\.(exr)$") when the job writes render
    # elements or AOVs as separate files, so this watcher tracks a single pass.
    pattern = re.compile(name_re, re.IGNORECASE)
    expected = set(range(first, last + 1))
    last_size, done = {}, {}
    deadline = time.time() + give_up_hours * 3600

    while True:
        for p in job_dir.rglob("*"):
            m = pattern.search(p.name) if p.is_file() else None
            if not m or int(m.group(1)) not in expected or int(m.group(1)) in done:
                continue
            size = p.stat().st_size
            if size > 0 and last_size.get(p) == size and header_ok(p):
                done[int(m.group(1))] = p    # stable across two polls, valid header
            last_size[p] = size

        missing = sorted(expected - done.keys())
        print(f"{len(done)}/{len(expected)} frames verified, {len(missing)} outstanding")
        if not missing:
            return [done[f] for f in sorted(done)]
        if time.time() > deadline:
            raise TimeoutError(f"frames still missing: {missing[:20]}")
        time.sleep(poll)
The search is recursive, so frames are found by name whatever subfolder layout the download uses. When the job shows as completed but the watcher still reports gaps, use Sync output on that job in the Client App, which re-downloads missing frames (or re-run aws s3 sync), and let the watcher run again; do the same if a frame's size looks short, since a stalled partial download can look stable too. If you prefer events to polling, the watchdog package wraps the operating system's file-change notifications; keep the stability check either way. If a job writes render elements or AOVs as separate files, run one watcher per pass, or a finished pass can mask a missing beauty frame with the same number.
Step 6: Local post-render steps
Once the watcher returns a verified list, the rest is ordinary pipeline code:
import subprocess

def encode_review(frames_dir, pattern, start, out, fps=24):   # pattern e.g. "shot010.%04d.png"
    subprocess.run(["ffmpeg", "-y", "-framerate", str(fps), "-start_number", str(start),
                    "-i", f"{frames_dir}/{pattern}", "-vf", "scale=trunc(iw/2)*2:trunc(ih/2)*2",
                    "-c:v", "libx264", "-pix_fmt", "yuv420p", "-crf", "18", str(out)], check=True)
A few habits worth copying:
- Encode from display-referred frames. PNG or JPEG can go straight to a review movie. Linear EXR needs your color pipeline (usually an OCIO transform) first, or the movie will look dark and flat.
- Archive the manifest with the frames. Six months later, "which textures made this render" is one file away.
- Notify with facts. Frame count, frames that needed a sync, total size, review movie path, posted to your studio chat or tracker.
- Keep your own copy as the archive of record. Files on our farm are kept as long as needed to run your jobs and let you download your results, with no fixed automatic deletion period, and we delete them whenever you ask. That is not a backup plan; your local archive is.
Scheduling the local pieces
None of this needs a new scheduler. Cron on Linux, launchd on macOS or Task Scheduler on Windows can run pre-flight, manifest and the AWS CLI upload on projects marked "ready" each evening, so the files are in your SRF Space before anyone sits down to submit. The watcher can start right after submission, or run as a scanner over a watch list fed by the Step 4 handoff sheets.
One dependency to plan around: auto-download only happens while the Client App is running on a machine that is awake and online. On Windows, it installs a background service that keeps transfers going after the main window is closed. Run it, or your scheduled aws s3 sync, on a machine that stays on overnight.
Summary: what to automate, and how
| Stage | Scriptable today on our farm? | How |
|---|---|---|
| Scene validation (missing and absolute paths) | Yes | Python inside the DCC (bpy, maya.cmds, pymxs, c4d, hou) |
| Pre-flight check on the project folder | Yes | Local script; block on archives, missing scene, zero-byte files |
| Manifest and change diff | Yes | SHA-256 per file, JSON next to the project |
| Upload to the farm | Yes, with S3 access | AWS CLI (aws s3 cp --recursive or aws s3 sync) with the key from Cloud Direct Connect; manual options are web upload (slow above about 2 GB, unreliable above about 5 GB) and the Client App (resumable, parallel chunks) |
| Job submission | No | Web dashboard, Client App, or plugin in 3ds Max, Maya, Cinema 4D; public API on the roadmap |
| Download of finished frames | Yes, with S3 access, or handled for you | aws s3 sync from SuperRendersOutput/<jobId>/; or Client App auto-download, frame by frame; or web download |
| Frame verification | Yes | Local watcher: size stable, header valid, full range present |
| Encode, archive, notify | Yes | ffmpeg, file copy, your chat or tracker |
Automate both ends, keep the middle short and deliberate, and verify everything that comes back. If most of your projects are Blender scenes, our Blender cloud render farm page covers how those jobs run on our side, and the Client App documentation and submission plugin documentation cover the manual steps in detail.
FAQ
Q: Can I upload a project to the render farm from a Python script?
A: Yes, with S3 access. Generate an access key under Cloud Direct Connect in your account, configure the AWS CLI with it (region ap-southeast-1), and have your script run aws s3 cp --recursive or aws s3 sync on the unpacked project folder into your Remote Directory. Run your pre-flight check first so a broken project never goes up. Submitting the job afterwards is still manual.
Q: Should I use S3 access or the Client App? A: Use S3 access when transfers should run from a script or a scheduler, or when your team already works with an S3 client such as Cyberduck. Use the Client App when a person uploads by hand: it resumes large transfers after a dropped connection, submits jobs, and auto-downloads finished frames as they finish. The two combine well: S3 access for scripted transfers, the Client App for submission.
Q: Is there an API or SDK to submit render jobs from my pipeline? A: Not today. Jobs are submitted from the web dashboard, the Client App, or the submission plugin in 3ds Max, Maya or Cinema 4D. A public API for programmatic submission is on our roadmap but not available, so build automation around the stages you own. If your pipeline is blocked on it, tell our support team the use case.
Q: Does the farm offer SFTP or FTP access for large transfers? A: No. We do not run an SFTP or FTP service for uploads, downloads or rental machines. Large projects go through the Client App, which uploads in resumable, parallel chunks, or through S3 access with Cyberduck or the AWS CLI. Finished frames come back through Client App auto-download, web download, or S3 access.
Q: How do I know all my frames came back?
A: Run a watcher on the folder where the Client App auto-downloads the job, or where your aws s3 sync writes it. Count a frame as done only when its size is stable across two checks and its header is valid, and compare the verified set with the expected range. If the job is complete and frames are still missing, use Sync output in the Client App or re-run the sync.
Q: Should I zip the project before uploading to save time? A: No. The farm does not extract archives (.zip, .rar, .7z, .tar, .tar.gz), so nothing inside an archive gets rendered. Upload the project folder unpacked, with the scene file and every referenced asset in place, whichever upload path you use.
Q: How long are rendered frames kept on the farm? A: There is no fixed automatic deletion period. Files are kept as long as needed to run your jobs and let you download your results, and we delete them whenever you ask. Treat your own storage as the archive of record, and use Client App auto-download so frames reach your disk as they finish.
About Alice Harper
Blender and V-Ray specialist. Passionate about optimizing render workflows, sharing tips, and educating the 3D community to achieve photorealistic results faster.