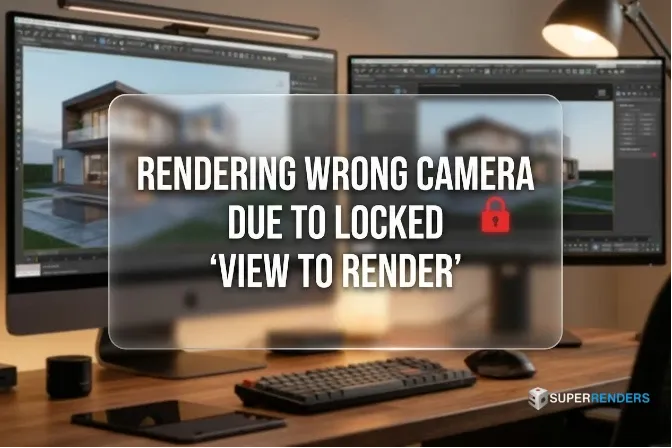
How to Fix Wrong Camera Rendering Due to Locked "View to Render" in 3ds Max
Overview
Introduction: The Camera Bottleneck
A single wrong camera selection derails production. You render 50 frames at high resolution, wait 4+ hours for completion, then discover the render shows the wrong camera view. The frame is useless. Resubmit. Lost 4 hours.
This happens constantly in studios without proper camera workflow. It's also the most preventable error—if you understand how 3ds Max handles cameras and the "View to Render" lock mechanism.
This guide covers: selecting cameras, locking your view, preventing this error, and batch-rendering multiple cameras efficiently.
3ds Max Camera Types: Standard vs Physical
3ds Max offers two camera classes:
Standard Camera:
The legacy camera type. Adequate for most work but lacks physical accuracy.
- Create > Cameras > Standard Camera
- Controls: FOV (degrees), Focal Distance, Lens parameters
- Rendering: Works with all render engines but assumes simplified optics
Physical Camera:
Introduced in 3ds Max 2017, the Physical Camera mimics real photography equipment—ISO, aperture, shutter speed, etc.
- Create > Cameras > Physical Camera
- Controls: More precise and photorealistic
- Render engines: V-Ray and Corona have native Physical Camera support
For archviz and product visualization, use Physical Camera. For general modeling and animation, Standard Camera is sufficient.
Selecting the Active Camera
The viewport displays the "active camera." When you render, 3ds Max uses whichever camera you've selected as active.
Method 1: Using the Render Setup Dialog (Safest)
- Press F10 to open Render Setup dialog (or Rendering > Render Setup)
- At the top of the dialog, you'll see a dropdown: "View to Render"
- This dropdown lists all cameras in your scene
- Click the dropdown and select your desired camera by name
- Look for the Lock button directly right of the dropdown—this is critical
- Verify the Lock button is NOT pressed (unlocked state)
If the Lock is engaged, the viewport cannot override the camera selection. You'll render the locked camera regardless of what's active in the viewport.
Method 2: Using the Viewport's Camera Selector
In the viewport's upper-left corner:
- Click the viewport label dropdown (usually says "Camera" or "Perspective")
- Select your camera from the list: "Camera001", "ProductShot_Hero", etc.
- The viewport switches to that camera immediately
- Rendering uses the active viewport camera (if View-to-Render is not locked)
Method 3: Selecting Cameras in the Scene Explorer
- Open Scene Explorer: Extras > Scene Explorer (or press Alt+5)
- In the Objects tab, expand "Cameras"
- Click your desired camera name
- In the properties panel, confirm "Active Camera" is checked
The "View to Render" Lock: The Critical Setting
This is where most errors occur. The "View to Render" lock prevents you from accidentally rendering the wrong camera.
How the Lock Works:
When unlocked (normal state): Render Setup reads the currently-active viewport camera. Switch cameras in the viewport, and the next render automatically uses the new camera.
When locked: Render Setup ignores the viewport's active camera. It renders a specific camera (the one locked in the dropdown) regardless of what's shown in the viewport. This prevents accidents but can confuse users who forget they've locked the camera.
Proper Workflow:
- Open Render Setup (F10)
- Locate "View to Render" dropdown
- Select your desired camera
- Ensure the Lock button is UNLOCKED (the button appears not-pressed)
- You're safe now—the viewport and render are synchronized
The Error That Happens:
- Artist A locks the camera to "ProductShot_Hero"
- Artist B switches viewport to "InteriorWide" camera to compose a different shot
- Artist B hits Render, expecting to see "InteriorWide"
- Render produces "ProductShot_Hero" (because it's still locked)
- Artist B is confused
Prevention:
Establish a studio rule: Never leave View to Render locked overnight or between work sessions. At end-of-day, unlock it. If working in teams, create a template scene file with View to Render unlocked.
Batch Rendering Multiple Cameras
For a single archviz project, you might need 10-20 camera angles (hero shot, context, detail, etc.). Rendering each individually is tedious.
Batch Render Setup:
-
First, ensure all your cameras are named clearly:
- "01_Hero_Exterior" (main shot)
- "02_EntryDetail" (closeup)
- "03_InteriorWide" (wide interior)
- etc.
Naming matters—output filenames derive from camera names.
-
Open Render Setup (F10)
-
In Render Setup dialog, find "Batch Render" tab (or menu: Rendering > Batch Render)
-
Click "Add" to add jobs
-
For each camera/frame combo, add a row:
Camera Start Frame End Frame Output Path 01_Hero_Exterior 0 0 C:\renders\hero.exr 02_EntryDetail 0 0 C:\renders\entry.exr 03_InteriorWide 0 0 C:\renders\interior.exr For single-frame renders (still images), set Start = End = 0.
-
Click "Render All" to execute the batch
3ds Max renders each camera sequentially. This is sequential, not parallel—if render farm support is available, use the farm instead of local batch.
Using State Sets for Camera Management
State Sets are underutilized but powerful. They save/restore complete camera + lighting configurations.
Creating a State Set:
- Set up your first camera (framing, lighting, materials visibility)
- Open State Sets: Tools > Manage States (or Extensions > State Sets)
- Click "Create a New State Set"
- Name it: "HeroShot_MorningLight"
- Click "Create State"
The State Set captures the current camera, all object visibility, lights, materials, and render settings.
Loading a State Set:
Later, you can load the same State Set:
- Open State Sets
- Click "HeroShot_MorningLight"
- Click "Load State"
Everything snaps back—camera position, lighting, object visibility, render settings. This is faster than manually switching cameras + lights + visibility repeatedly.
State Sets for Batch Rendering:
You can batch render across State Sets:
- Create State Sets for each camera + lighting combo
- In Batch Render, instead of listing individual cameras, check the "Use State Sets" option
- Select multiple State Sets to render
This is overkill for simple scenes but essential for complex visualizations with multiple lighting scenarios.
Locking the Viewport to Active Camera
Separate from the "View to Render" lock, you can lock your viewport display to always show the active camera:
- In the viewport, right-click the camera label (upper-left corner)
- Check "Show Safe Frame"
- Check "Lock Camera to View"
This ensures the viewport never drifts from your render camera—helpful when working with precision framing.
Batch Rendering via Command Line (Farm Submission)
For render farms, batch rendering happens via command line, not the GUI:
"C:\Program Files\Autodesk\3ds Max 2025\3dsmax.exe" -batch -logfile "D:\renders\log.txt" "D:\scenes\archviz.max" -outputfile "D:\renders\frame_#.exr" -start 1 -end 100
Key parameters:
-batch: Headless mode (no GUI)-logfile: Save render log to filescene.max: The scene file to render-outputfile: Output filename template (use#for frame numbers)-start / -end: Frame range
Specifying Camera:
To render a specific camera from command line:
3dsmax.exe -batch "scene.max" -outputfile "output.exr" -camera "HeroShot_Exterior"
Not all versions support -camera directly; if it fails, use MaxScript instead:
3dsmax.exe -batch "scene.max" -mxsScript "setCamera.ms"
Where setCamera.ms contains:
rendSaveFile = "D:\renders\output.exr"
renderWidth = 3840
renderHeight = 2160
activeCam = getNodeByName "HeroShot_Exterior"
viewport.setCamera activeCam
render()
Troubleshooting: Wrong Camera Renders
Symptom: Render shows the wrong camera view despite selecting a different camera in the viewport.
Diagnosis:
- Check "View to Render" lock status (F10 > Render Setup)
- If locked, unlock it
- Verify the camera in the viewport is the one you want to render
- Disable "Safe Frame" overlay (can visually deceive you into thinking you're seeing a different camera)
Solution:
- Open Render Setup (F10)
- Find the "View to Render" section
- Click the Lock button to unlock it (button appears unpressed after unlocking)
- Select your desired camera from the dropdown
- Test-render a single frame to confirm
Symptom: Camera is locked but you need to change it for batch render.
Solution:
- Unlock the View to Render camera
- Switch to your desired camera in the viewport
- Open Batch Render
- The batch will now render the current viewport camera
Real-World Case: Multiple Camera Renders
An archviz studio rendered a complex building exterior: 15 camera angles for a client presentation.
Initial Approach (Manual):
- Select camera 1
- Render (wait 1 hour)
- Select camera 2
- Render (wait 1 hour)
- ... repeat 15 times = 15 hours
Optimized Approach (State Sets + Batch):
- Create 15 State Sets, one per camera + optimal lighting for that angle
- Batch Render all 15 State Sets
- While renders process in background, artist works on other scenes
- Result: 15 frames completed in 15 hours total (sequential but unattended)
Time saved was zero (still 15 hours), but attention required was zero. The artist submitted once and forgot about it.
FAQ
Q: Can I render multiple cameras in parallel? A: Not from 3ds Max itself—batch render is sequential. But render farms (Deadline, etc.) can parallelize. Submit 15 jobs to a farm, and they render simultaneously across 15 machines.
Q: Should I use Standard or Physical Camera? A: Physical Camera for archviz (more photorealistic). Standard Camera for general work. Don't mix in the same project—cameras with different FOV calculations look inconsistent in batch renders.
Q: What happens if I delete a camera that's locked to View to Render? A: 3ds Max reverts to the default camera. Future renders render the default instead. This is a silent failure—no error message. Always unlock before deleting cameras.
Q: Can I render the same camera with different lighting setups in batch? A: Yes, using State Sets. Create State Set A (camera + day lighting) and State Set B (same camera + night lighting). Batch render both.
Q: How do I automate rendering 50 cameras across a farm? A: Write a Python or MaxScript that loops through all cameras, submits each to the render farm. Deadline (most common farm software) provides plugin support for bulk submission.
Q: What's the difference between "Active Camera" and "View to Render" camera? A: Active Camera is what you see in the viewport. View to Render is what gets rendered. If they don't match and View to Render is locked, you get wrong-camera renders.
Q: Can I preview what will render before hitting the render button? A: Yes. Enable "Show Safe Frame" in the viewport (right-click camera label). The safe frame boundary shows exactly what will render. If it looks wrong, switch cameras before rendering.
Related Resources
Learn about camera techniques and render optimization:
- Rendering Wrong Camera: Complete Troubleshooting Guide
- 3ds Max Performance Optimization for Large Scenes
- Forest Pack Optimization for Render Farms
Explore render farm batch submission strategies:
- Render Farm Guide for Architecture Studios
- Cloud Rendering for Product Visualization
- Getting Started with Cloud Rendering
External Resources
For official 3ds Max documentation on cameras and rendering:
About Thierry Marc
3D Rendering Expert with over 10 years of experience in the industry. Specialized in Maya, Arnold, and high-end technical workflows for film and advertising.