
Issue:
When loading 3ds Max scene files, a message appears indicating some (or all) external bitmap files are missing. This message can appear whether loading scenes locally or from network locations.
The message may also appear when opening project folders or transferring projects between different 3ds Max versions or user workstations.
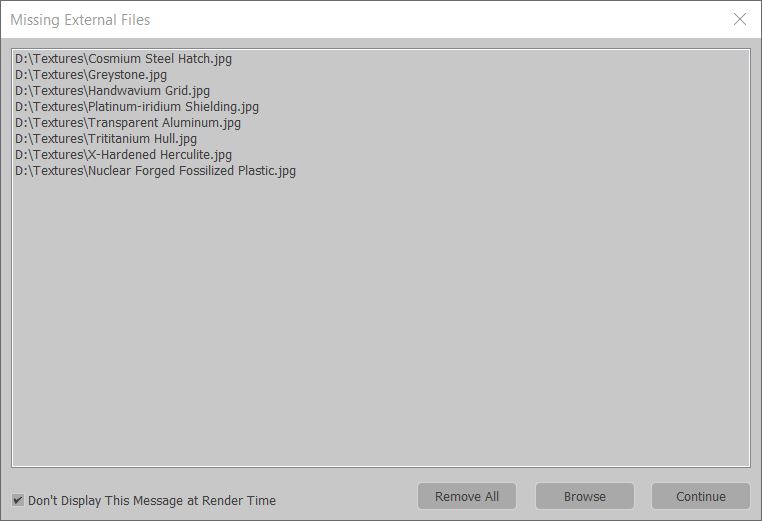
Missing External Files
<missing file path>
<missing file path> …
Causes:
Possible causes for a scene file missing assets, such as bitmaps, are:
- Bitmaps have been moved or renamed since the original 3ds Max scene file was created and saved.
- Bitmap paths are not set correctly in the Configure Project (or User) Paths menu.
- UNC pathing is not used over a network setting and UNC conversion is not used in 3ds Max Preferences.
- Error with Automatic switching enabled in File > Projects.
- Windows directory paths have naming conventions exceeding the 256 character limit.
- Workstations do not have proper access or permissions.
- File or path names use special characters.
Solution:
To avoid missing map errors when loading various scenes in 3ds Max, it is important to note the following:
- By default, the program first searches for bitmaps and files for any open scene within the folder from which the MAX file was loaded.
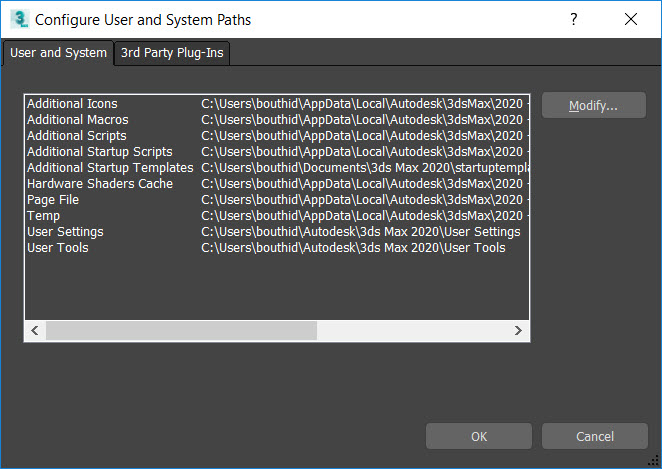
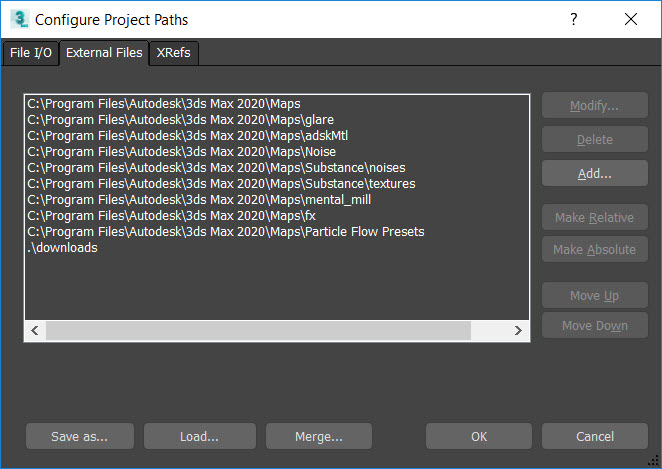
- Next, it searches all the bitmap and file paths set in the Configure User and System Paths and Configure Project Paths menus, shown in the following images:
To resolve any “missing external files” errors try the following solutions:
Re-path missing bitmaps to new folders
In addition to adding paths in the Configure Project Paths menu, ensure that 3ds Max can access all external bitmaps (and assets) on a PC or network share by trying to first re-path the missing files or folders:
- Make sure the bitmaps are:
- Present somewhere on the local machine or the network.
- Haven’t been renamed, moved or deleted.
- Do not contain special characters in their file name or Windows folder path.
- Located somewhere that has proper Windows and Firewall permissions.
- Depending on whether individual files, or an entire folder of assets is missing, do one of the following:
- If single files are missing from the scene:
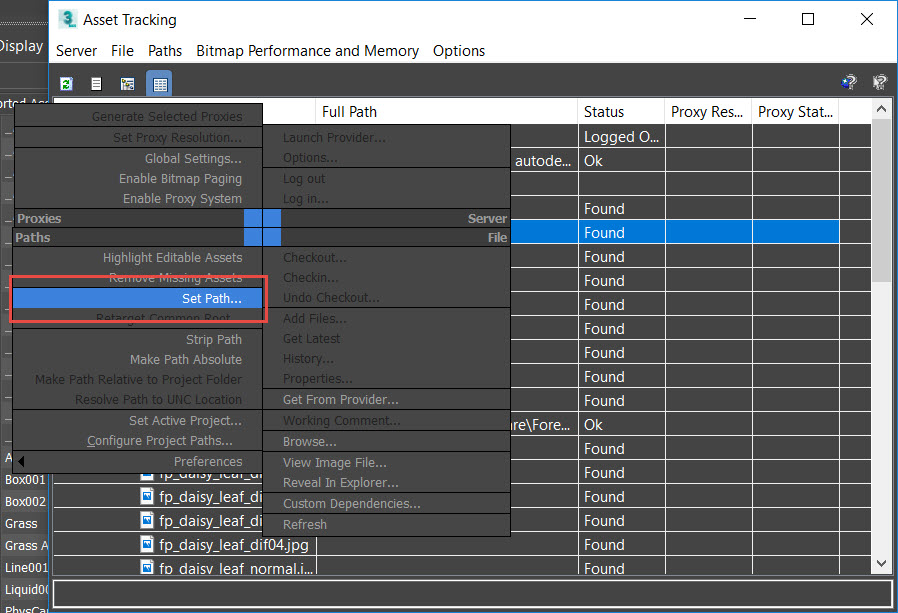
- Go to the File menu.
- Choose Reference.
- Select the Asset Tracking Toggle menu. Use the Asset Tracking dialog to set or re-set specific bitmap paths as necessary.
- If single files are missing from the scene:
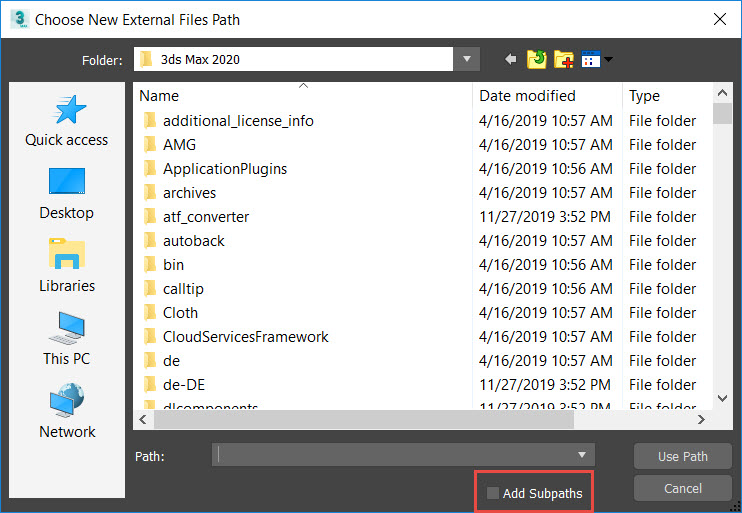
- If an entire folder of assets or bitmaps are missing from the scene:
- Go to the Customize menu
- Choose Configure Project Paths.
- Select the External Files tab.
- Click Add.
- Choose all desired folders where the missing bitmaps are located. This option enables users to choose and store up to 1024 separate bitmap folders and sub-folders in the 3dsmax.ini file.
Note: Clicking the “Add Sub-paths” button will add all nested folders inside of a selected folder. 3ds Max will then search those folders for bitmap assets as well.
Use UNC paths
UNC Paths can prevent files from not being found when accessing shared network folders (or printers) on a local area network. If possible, use UNC paths instead of mapped drive letters, as described here: How to assign a file path using the Universal Naming Convention (UNC).
Additionally when starting projects, ensure the Convert file paths to UNC option is checked. The option can be found in the following location:
- Go to the Customize menu.
- Choose Preferences.
- Select the Files tab menu.
- Check the box Convert file paths to UNC.
Use Relink Bitmaps
Some users may still encounter problems with bitmaps being found in certain folders or on specific hard drives. If the issue persists, test using the Relink Bitmaps script created by Colin Senner.
Archive Scene files and using the Resource Collector
If necessary, archive 3ds Max scene files to collect all bitmaps required for rendering or moving hard drives (this feature will preserve the files original folder hierarchy within the ZIP file).
- To archive a scene file and all bitmap assets used in the scene:
- Go to the File menu.
- Select the Archive feature. A command prompt-type dialog window will open and begin collecting and archiving the bitmap files.
- To collect all scene assets into one folder location, use the Resource Collector Utility:
- Go to the Command Panel.
- Choose the Utilities tab.
- Click More.
- Select the Resource Collector.
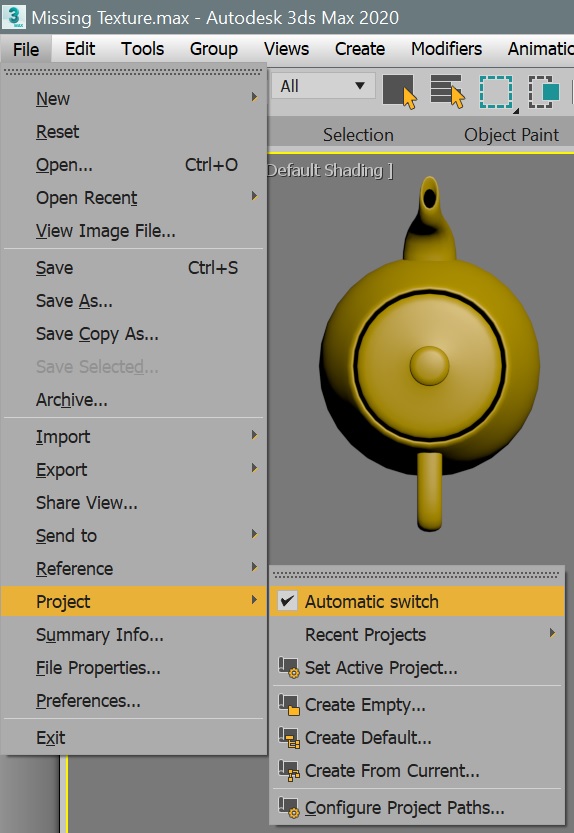
Change Automatic Switching settings in Projects
While the Automatic Switch for Projects generally works, there may be occasions when it will cause path or file location issues. To address this:
- In the main toolbar, go to the File menu.
- Choose Project.
- Uncheck “Automatic Switch.” This setting takes effect immediately and doesn’t require that 3ds Max be restarted.
Change the Windows character limit for file paths
If bitmap paths exceed the Windows 256-character limit, 3ds max may not be able to find these files. To avoid this issue:
- Use shorter paths in Windows.
- Change the Windows 10 character limit to extend past 256 characters. To do this follow the steps in the article: How to change the default 256 character path limitation (MAX_PATH) in Windows 10.
See also
- Cannot Create Shortcut For 3rd-Party Plug-In In 3ds Max 2020.1
- Refer to render farm service: https://superrendersfarm.com/
Source: https://autode.sk/398r0G4